O2H auto publish
Yet Another Obsidian Publish 1 (Github Page)
In this article, I will show something impressive. As an old Obsidian user, I have been living Obsidian for more than 2 years. When Obsidian became an important part of my life, I have a small trouble with publishing articles. I know I can export my notes to HTML and publish them, but I want a better way to do it. After searching for a while, using Obsidian’s Publish from Vault feature is an available solution, but I would like to share my article on some Blog platform. On one hand, my blog might have higher priority on Google search result. And on the other hand, I enjoy discussing with others by blog comments, so I would not give up using my own blog website.
So, here I would like to share my method of using Obsidian with a blog. With the help of GitHub pages and Hexo, I can easily publish my articles from Obsidian. Since Hexo is a static website generator, it is not hard to understand why it can be integrated with Obsidian. The process is simple:
- Export your notes from Obsidian to Markdown format.
- Use Hexo to generate a complete HTML page for each note and upload them to your Github repository.
- Wait till GitHub page generating action is finished.
- Enjoy.
Sounds good, but it would take a period time to publish one single article. In the first step, you have to replace image references in Obsidian to standard Markdown syntax. Meanwhile, in hexo, you have to edit the meta data like date, tags, categories for each markdown file. In order to solve these problems, I build a python script to solve them automatically.
Generate common Markdown file
Package Install
Chivier/obsidian2hexo (github.com)
H2O2H(Hexo-to-Obsidian & Obsidian-to-Hexo, but currently I only build obsidian to hexo), is the package.
The install method is simple:
1 | |
Usage
The usage is also simple,
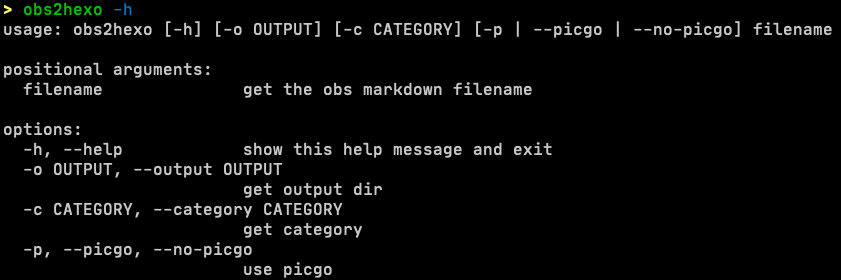
In Hexo, you can set a category for your post by adding the following code to the post’s front-matter:
1 | |
You can also use tags to further classify and organise posts. To assign tags to a post, add the following code to the post’s front-matter:
1 | |
So, I build this CLI tool, it can find all tags in the Obsidian
markdown file, and write them to the meta data of Hexo markdown file.
The default output dir is /tmp/o2houtput, and you can set
this to any other place if you like.
In addition, Github repository’s space is limited, so I provided an
optional argument. If -p is added, obs2hexo will auto
upload all pictures by using picgo upload[^1].
Example
Here are some examples:
1 | |
Obsidian Upload Script
Install Shell Commands
After a CLI tool is built, the next step is to bind it into obsidian for easier use. The best method is to develop a new plugin, but I prefer to use python script for flexible modification. Another reason is that I have not resolved all the links in Obsidian. As is known, obsidian can use Wikilinks to reference other notes. And I will build a database to record all the published notes.

Anyway, my current solution is not so perfect and I would like to keep improving my current solution. After I take all possible situation into consideration, I will build a plugin then.
So, you might ask me, how to improve the user experience without build an obsidian plugin? Ans the key is Obsidian Shell Commands[²].
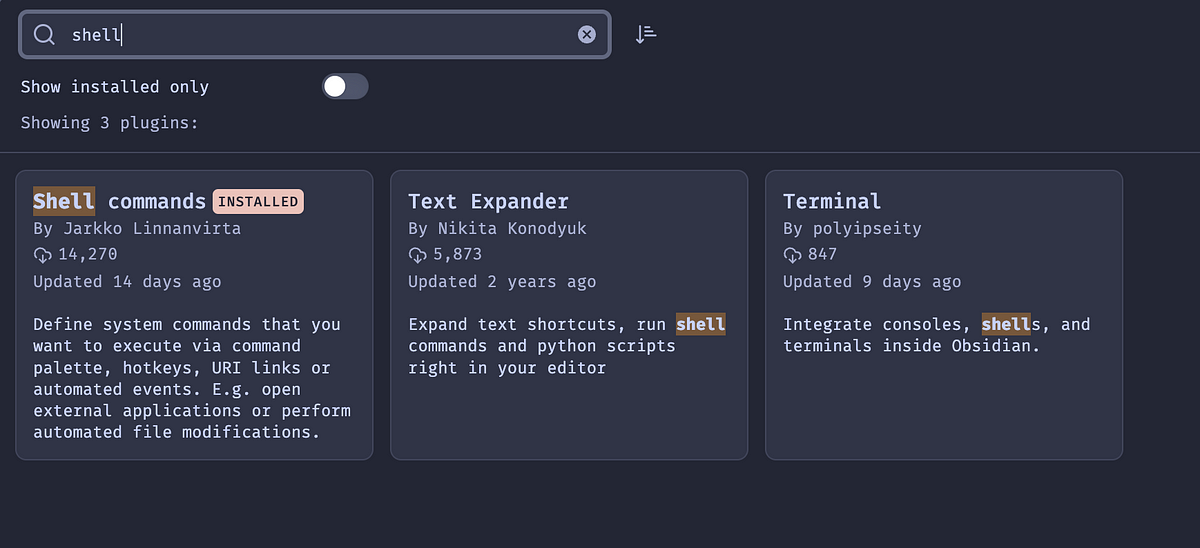
You can find it in Community Plugins. After installing
and enabling the plugin, the plugin settings can be edit in the Obsidian
setting panel.

Config the Shell commands
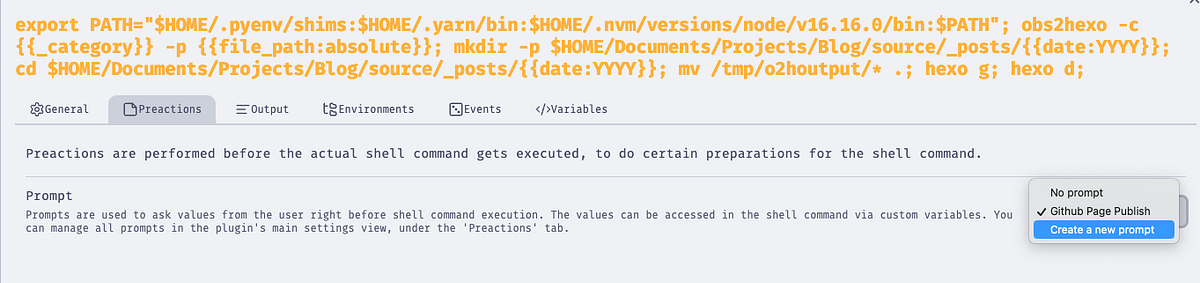
Here is my example of how to build a shell script to publish my article:
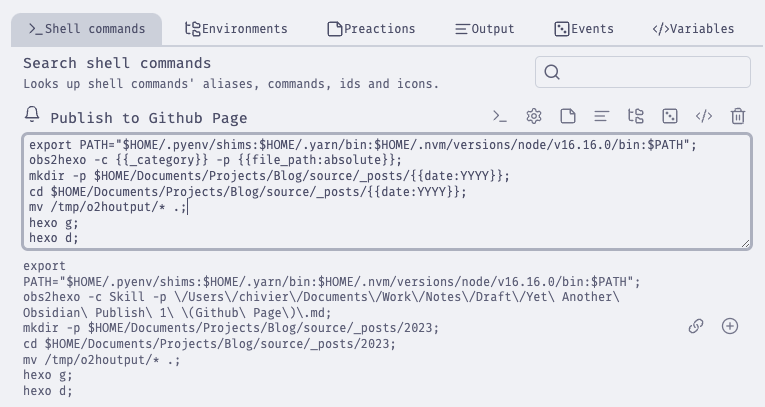
On the script above, I introduce the $HOME/.pyenv/shims
and $HOME/.yarn/bin. As I use pyenv to manage my Python
virtual environment, and the path should be
$HOME/.local/bin if you just use system python. And I use
picgo to upload pictures, so I
introduced .yarn and .nvm path into the
$PATH variable.
And then, there are some other variables in shell commands plugin,
like {{date:YYYY}} and
{{_category}}. Most variables can be found after you
typed in {{`. Shell commands provide something like auto completion,
`{{_category}} is a special variable we set
in the command preaction panel.
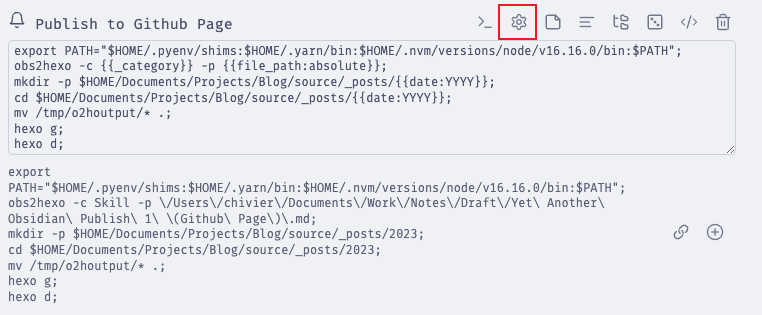
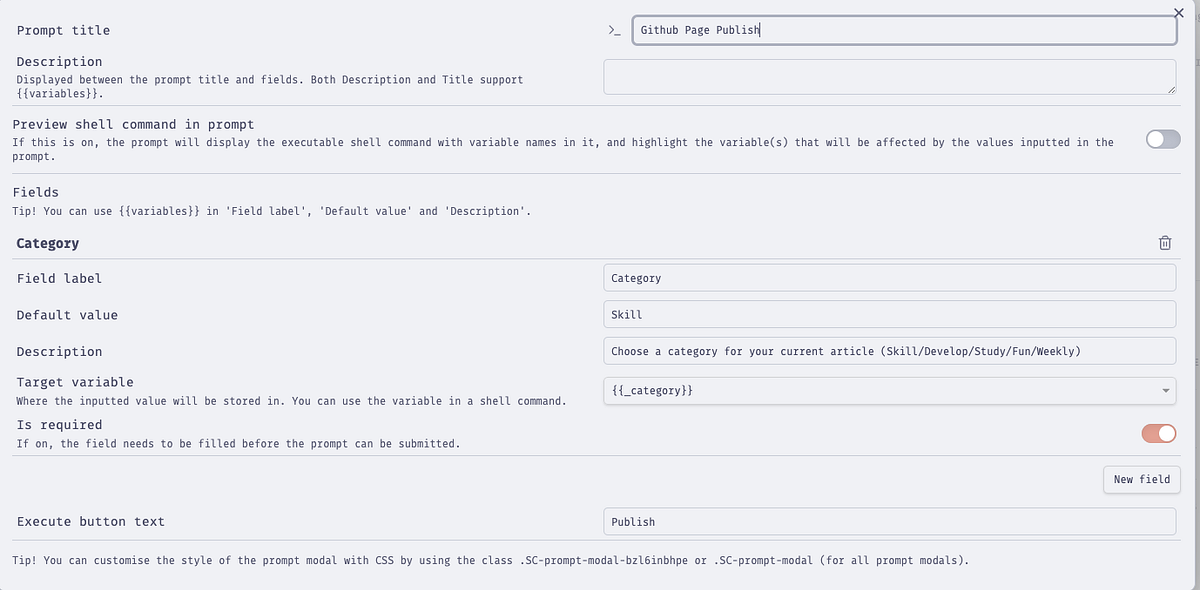
You can also build preactions here:
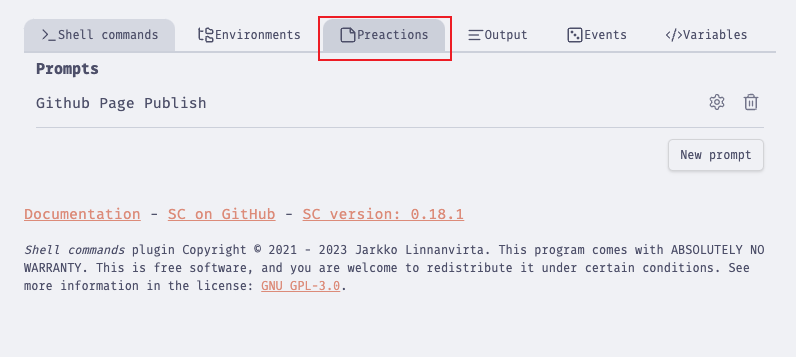
I set up a new field called category, so every time I run the command, it will promptly ask me to give a specific category for my aritcle.
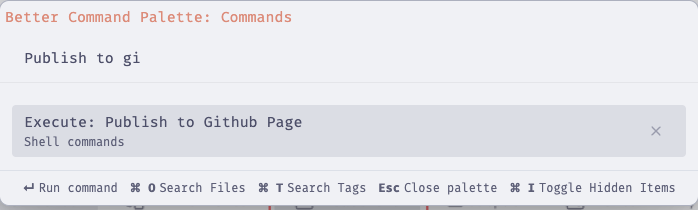
After all configurations are successfully set, we can call the commands in obsidian easily:
Reference
[¹]: PicGo/PicGo-Core: A tool for pictures uploading. Both CLI & API supports. (github.com)